Connect to Azure Repos
Azure Repos is a set of version control tools that you can use to manage your code. Azure Repos provides Git distributed version control and Team Foundation centralized version control (TFVC).
You can use a Harness Azure Repos connector to connect to Azure Repos Projects and individual repositories.
Requirements
You must have:
- An Azure Project and at least one repo.
- Permission to create connectors in Harness.
- A Harness project.
Create the connector
In your Harness project, select Project Setup, and then select Connectors.
You can also create connectors at the account and organization levels. For example, go to Account Settings to create a connector at the account level.
Select New Connector, and then select the Azure Repos connector.
Enter a Name for your connector, and then select Continue.
Select Project or Repository for the URL Type.
Select HTTP or SSH for the Connection Type.
Enter your Azure Repos Project or Repository URL.
Example: Repo URL, HTTP format:
https://ORG_NAME@dev.azure.com/ORG_NAME/PROJECT_NAME/_git/REPO_NAMEExample: Project URL, HTTP format:
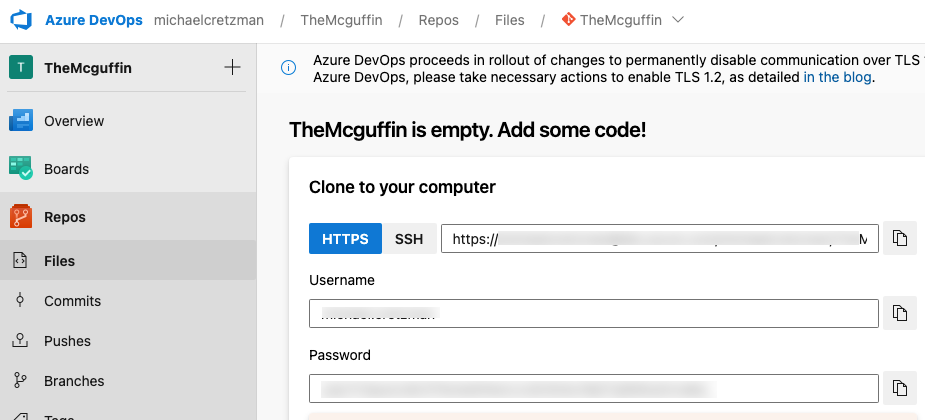
https://dev.azure.com/ORG_NAME/PROJECT_NAMEYou can get the URL from Azure Repos.

Be careful when copying Project URLs from Azure Repos, because the URL path can include
_git/REPO_NAME. Don't include this part of the path when you paste the URL into the Azure Repos Project URL field.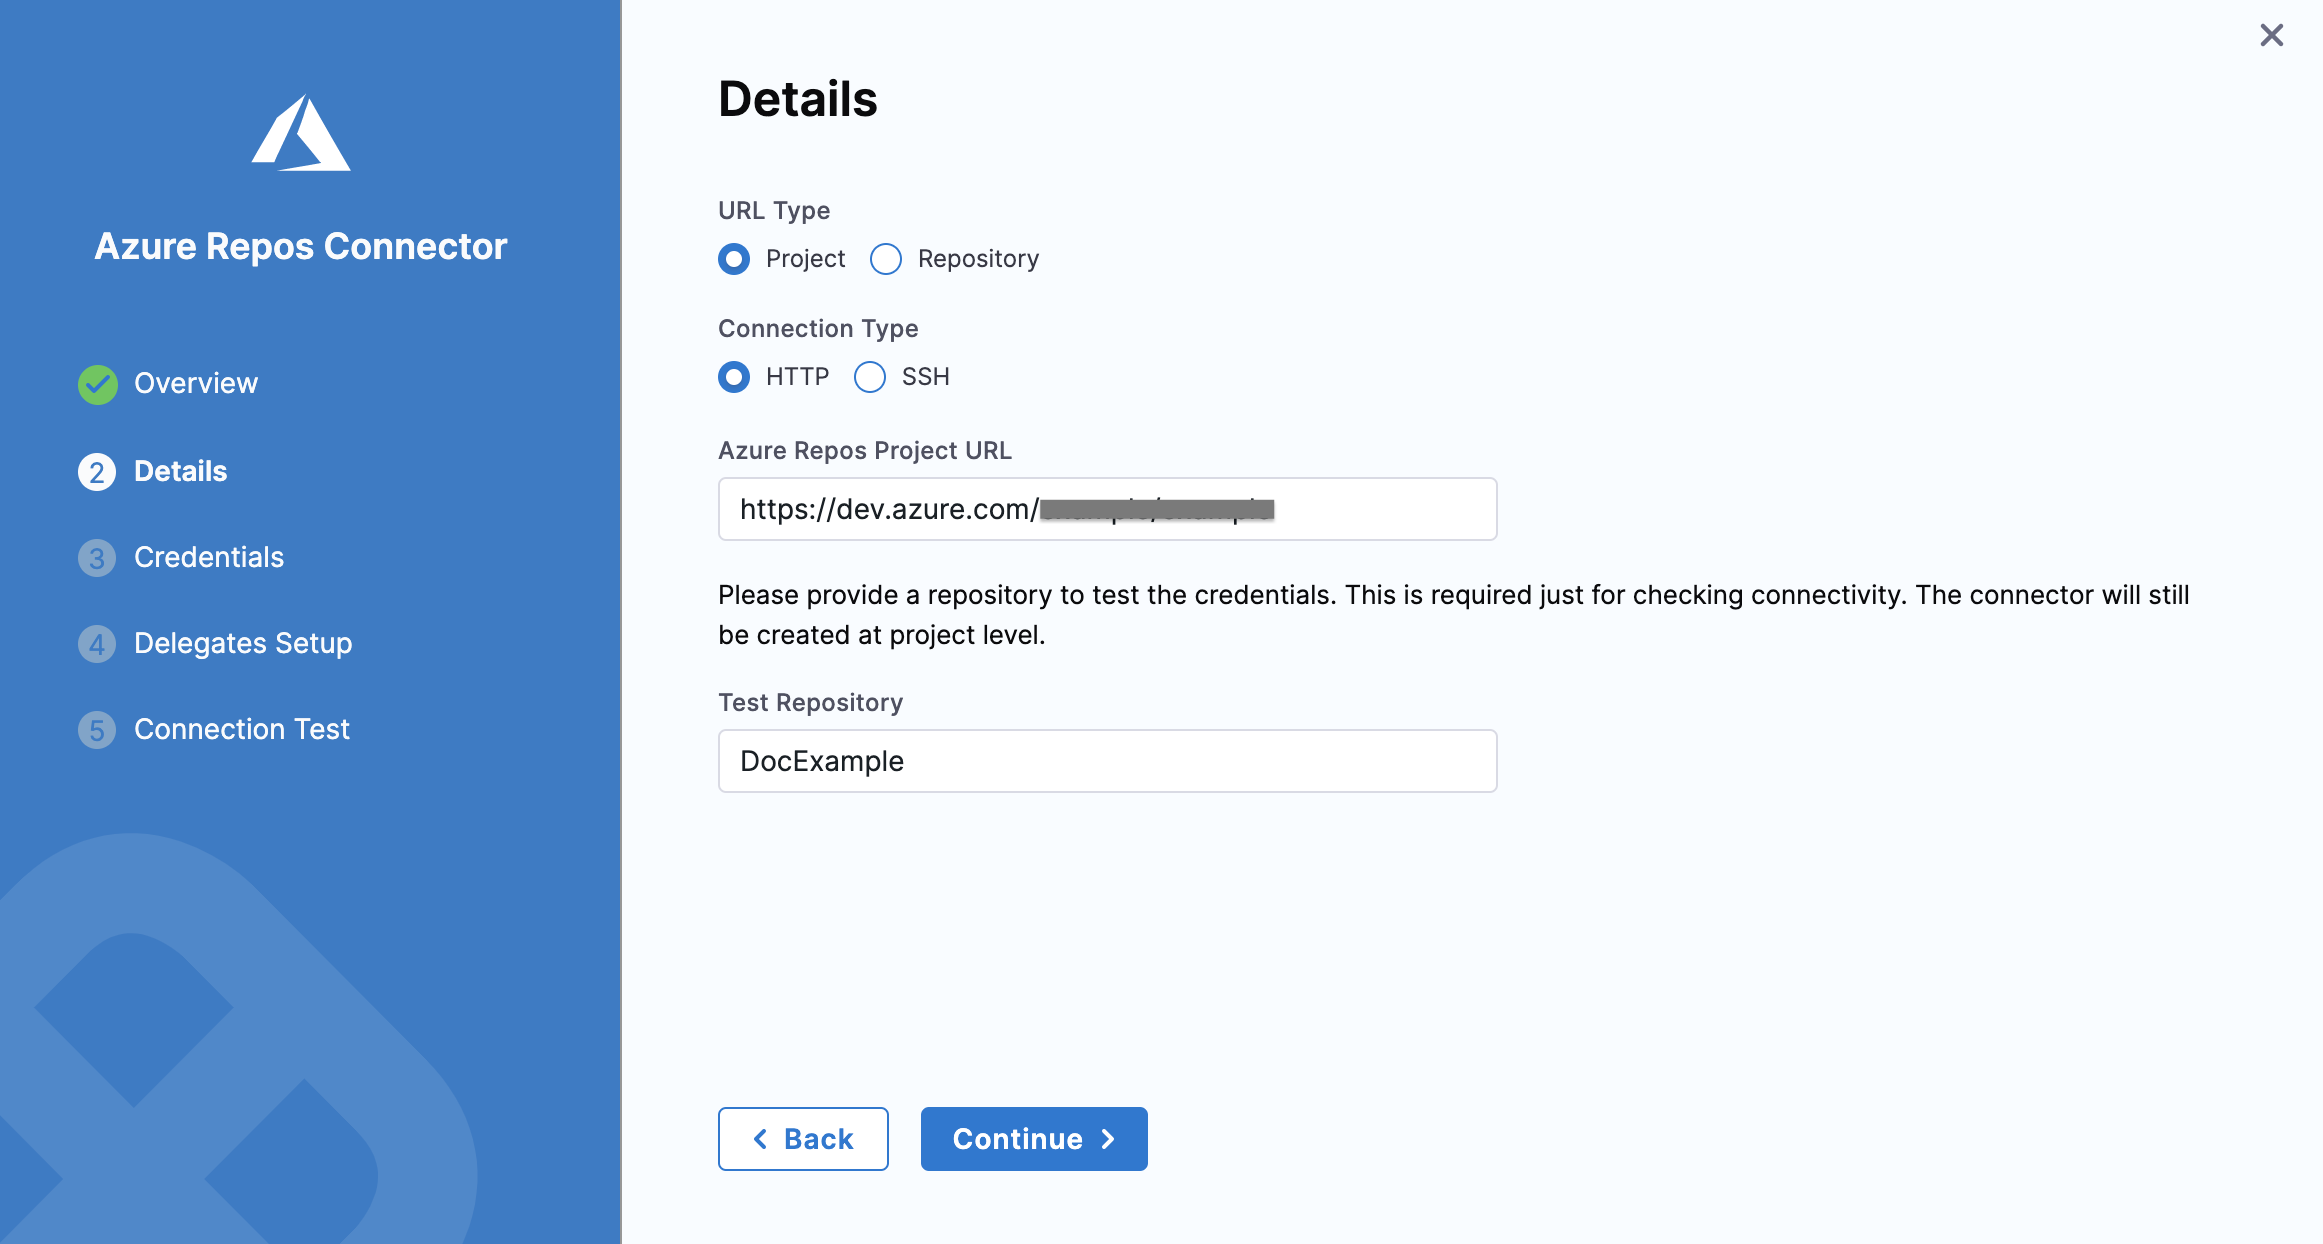
If you selected Project, in Test Repository, enter the name of a repository that Harness can use to test the connector's connection.
Select Continue, and then configure Credentials based on the Connection Type:
For HTTP connections, enter the username and password to access the project or repo.
For SSH connections, you must provide an SSH private key stored in a Harness encrypted text secret. You can use
ssh-keygen -t rsato create a private SSH key. For more information, go to the Microsoft documentation on Creating SSH Keys.
If required, select Enable API Access. This is recommended, and it is required to use Git event triggers, webhooks, and send build and PR statuses between Azure Repos and Harness.
You need an Azure Repos Personal Access Token to enable API access.
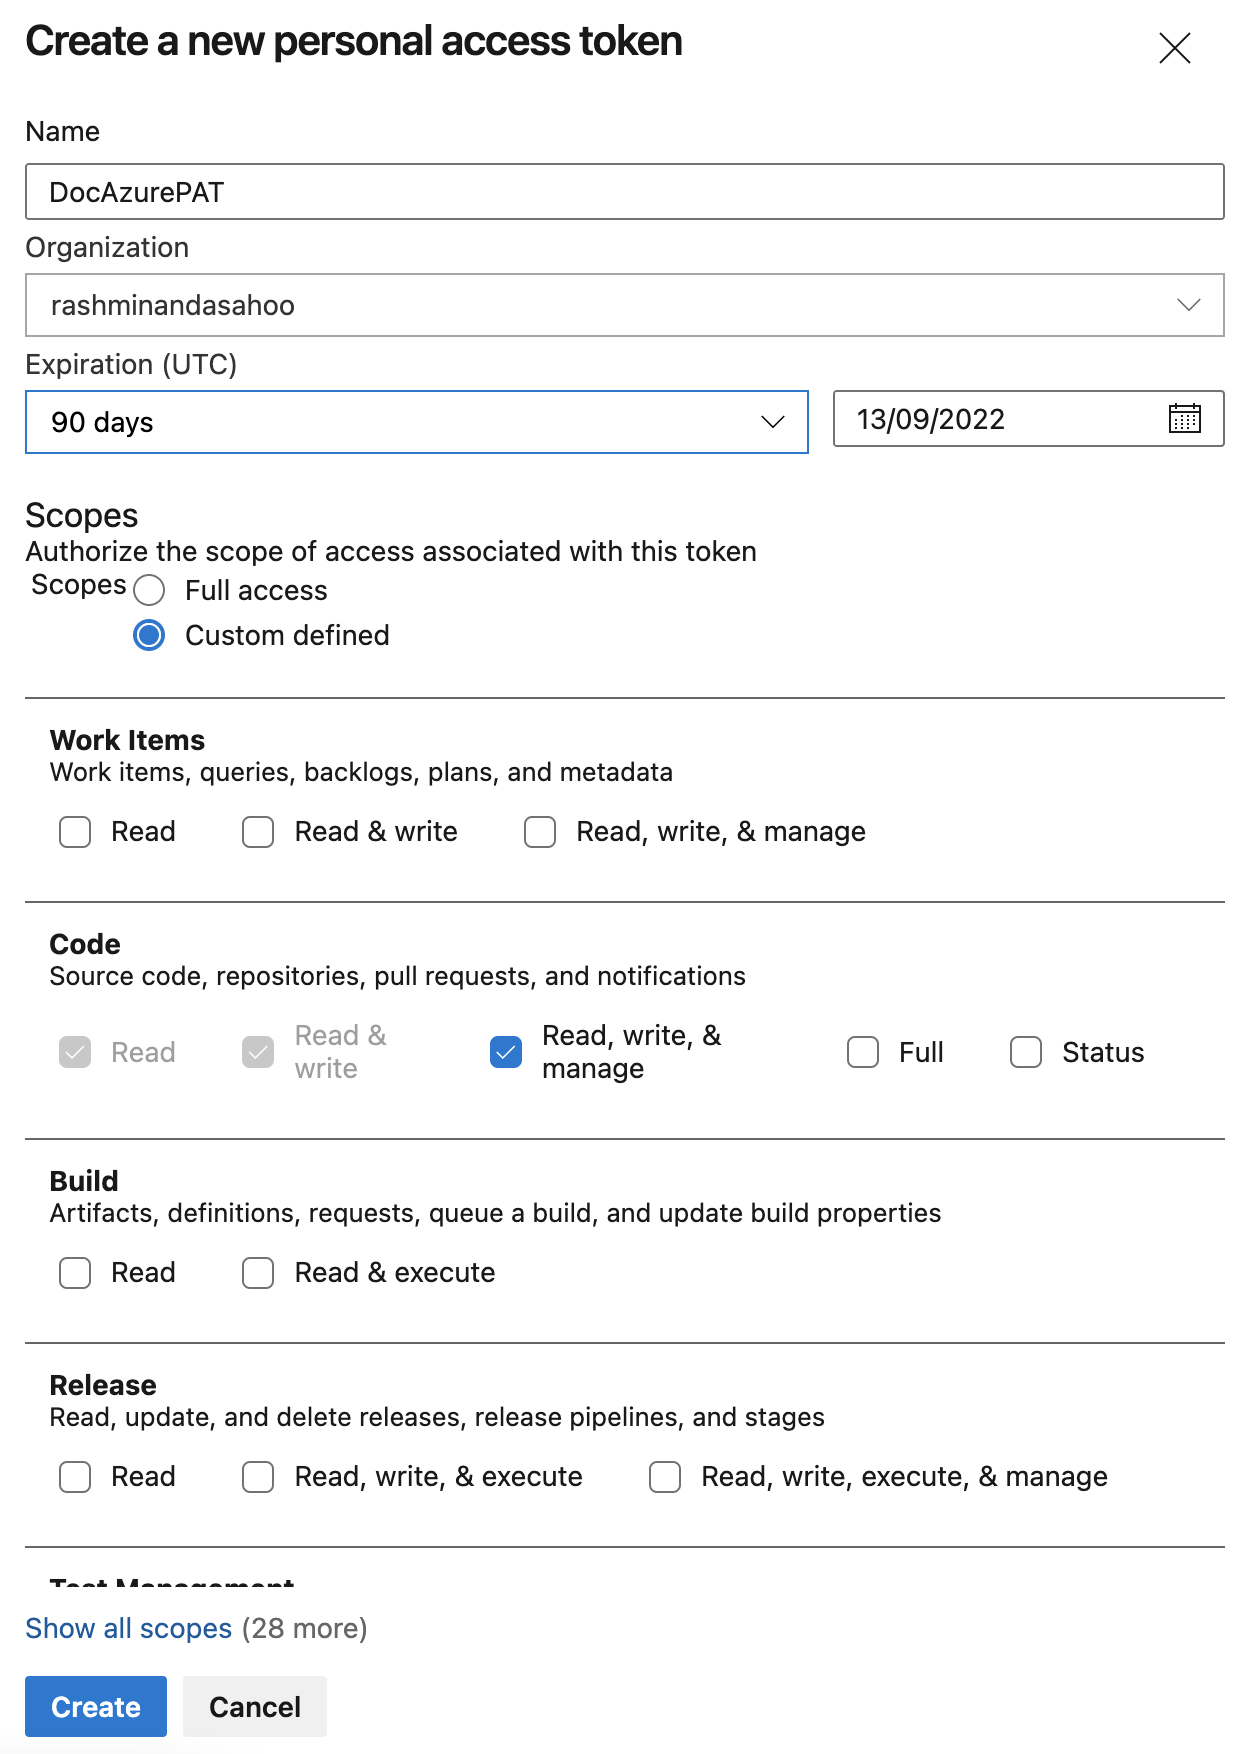
In Personal Access Token, select a Harness encrypted text secret containing an Azure Repos Personal Access Token. Harness requires the token for API access. Generate the token in your Azure account, and then add it to Harness as a secret.
Select Continue, and then configure the delegate connection. Select either:
- Use any available Delegate: Harness selects an available delegate at runtime.
- Only use Delegates with all of the following tags: Select specific delegates that you want Harness to use with this connector.
- Select Save and Continue, and then wait while Harness tests the connector's connection. If the test succeeds, select Finish.
Kubernetes delegate with self-signed certificates
If your codebase connector allows API access and connects through a Harness Delegate that uses self-signed certificates, you must specify ADDITIONAL_CERTS_PATH in the delegate pod, as described in Configure a Kubernetes build farm to use self-signed certificates.