Native Helm
This topic shows you how to perform Native Helm deployments using Harness.
Kubernetes and Helm vs Native Helm deployments
Harness supports the use of Helm in its Kubernetes deployment type. Harness also includes a separate Native Helm deployment type.
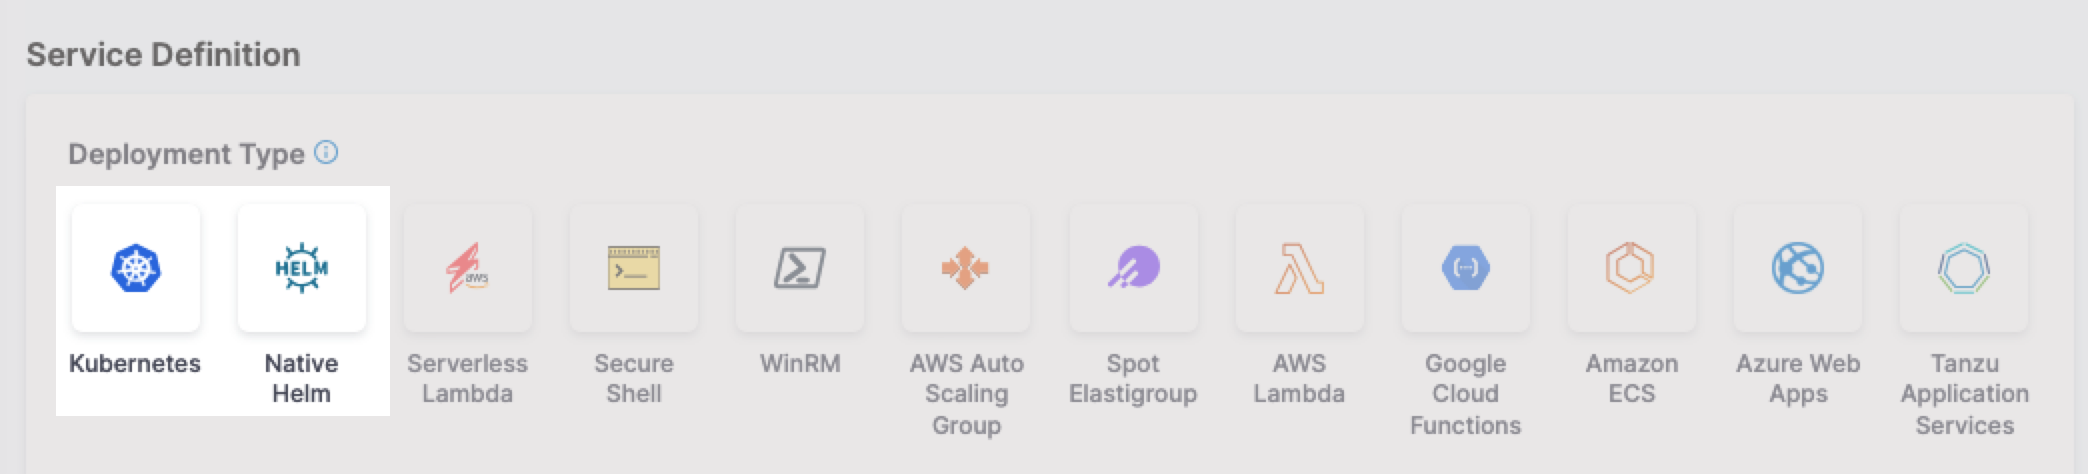
When you create a Harness service, you will see both Kubernetes and Native Helm options and wonder what are their differences.
Here are the differences:
- Kubernetes
- Native Helm
- Harness Kubernetes deployments allow you to use your own Kubernetes manifests or a Helm chart (remote or local), and Harness executes the Kubernetes API calls to build everything without requiring a Helm installation in the target cluster.
- Harness Kubernetes deployments also support all deployment strategies (canary, blue green, rolling, custom).
- Versioning: Harness Kubernetes deployments version all objects, such as ConfigMaps and Secrets.
- Rollback: In the event of deployment failure, Harness Kubernetes deployments will roll back to the last successful version.
- For Harness Native Helm Deployments, you must always have Helm running on one pod in your target cluster.
- You can perform a rolling deployment strategy only (no canary or blue green).
- Versioning: Native Helm does not version deployments.
- Rollback: Harness does not perform rollback. Instead, Harness uses Helm's native rollback functionality.
Helm 2 in Native Helm
Helm 2 was deprecated by the Helm community in November 2020 and is no longer supported by Helm. If you continue to maintain the Helm 2 binary on your delegate, it might introduce high and critical vulnerabilities and put your infrastructure at risk.
To safeguard your operations and protect against potential security vulnerabilities, Harness deprecated the Helm 2 binary from delegates with an immutable image type (image tag yy.mm.xxxxx). For information on delegate types, go to Delegate image types.
If your delegate is set to auto-upgrade, Harness will automatically remove the binary from your delegate. This will result in pipeline and workflow failures for services deployed via Helm 2.
If your development team still uses Helm 2, you can reintroduce the binary on the delegate. Harness is not responsible for any vulnerabilities or risks that might result from reintroducing the Helm 2 binary.
For more information about updating your delegates to reintroduce Helm 2, go to:
Contact Harness Support if you have any questions.
Deployment requirements
A Native Helm deployment requires the following:
- Helm chart.
- Kubernetes cluster.
- A Kubernetes service account with permission to create entities in the target namespace is required. The set of permissions should include
list,get,create, anddeletepermissions. In general, the cluster-admin permission or namespace admin permission is enough.
For more information, go to User-Facing Roles from Kubernetes.
Native Helm deploy stage
The following steps take you through a typical Native Helm pipeline stage setup to demonstrate the Harness settings involved.
Create a Project for your new CD Pipeline: If you don't already have a Harness Project, create a Project for your new CD Pipeline. Ensure that you add the Continuous Delivery module to the Project. Go to Create Organizations and Projects.
In your Harness Project, select Deployments, and then select Create a Pipeline.
Enter a name like Native Helm Example and select Start.
Your Pipeline appears.
Select Add Stage and select Deploy.
Enter a name like quickstart.
In Deployment Type, select Native Helm, and then select Set Up Stage.
In Select Service, select Add Service.
Give the service a name.
Once you have created a Service, it is persistent and can be used throughout the stages of this or any other Pipeline in the Project.
Next, we'll add the NGINX Helm chart for the deployment.
Add a Helm chart to a Native Helm service
To add a Helm chart in this example, we will add a Harness connector to the HTTP server hosting the chart. This connector uses a Harness Delegate to verify credentials and pull charts. Ensure you have a Harness Delegate installed also. For steps on installing a delegate, go to Delegate installation overview.
In the Harness service for your Native Helm deployment, in Manifests, select Add Manifest.
You can select a Helm Values YAML file or a Helm chart. For this example, we'll use a publicly available Helm chart. The process isn't very different between these options. For Values YAML, you simply provide the Git branch and path to the Values YAML file.
Select Helm Chart, and then select Continue.
In Specify Helm Chart Store, select HTTP Helm. In this example, we're pulling a Helm chart for NGINX from the Bitnami repo at
https://charts.bitnami.com/bitnami. You don't need any credentials for pulling this public chart.Select New HTTP Helm Repo Connector.
In the HTTP Helm Repo Connector, enter a name and select Continue.
In Helm Repository URL, enter
https://charts.bitnami.com/bitnami.In Authentication, select Anonymous.
Select Continue.
In Delegates Setup, select/create a delegate, and then select Save and Continue.
For steps on installing a delegate, go to Delegate installation overview.
When you are done, the Connector is tested. If it fails, your Delegate might not be able to connect to
https://charts.bitnami.com/bitnami. Review its network connectivity and ensure it can connect.
If you are using Helm v2, you will need to install Helm v2 and Tiller on the delegate pod. For steps on installing software on the delegate, go to Build custom delegate images with third-party tools.In Manifest Details, enter the following settings can select Submit.
- Manifest Identifier: enter nginx.
- Chart Name: enter nginx.
- Chart Version: enter 8.8.1.
- Helm Version: select Version 3.
The Helm chart is added to the Service Definition.

Next, you can target your Kubernetes cluster for deployment.
Using multiple Helm charts in a single Harness service
Currently, using multiple Helm Charts in a single Harness service is behind the feature flag CDS_HELM_MULTIPLE_MANIFEST_SUPPORT_NG. Contact Harness Support to enable the feature.
For Kubernetes Helm and Native Helm deployment types, you can add multiple Helm charts to a Harness service.
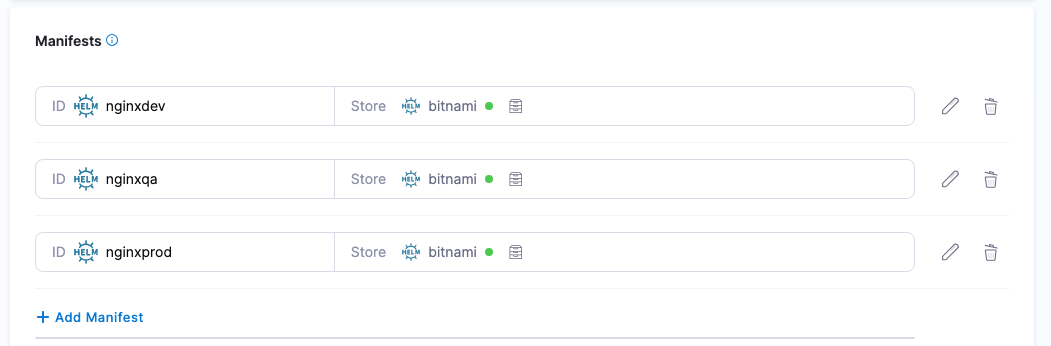
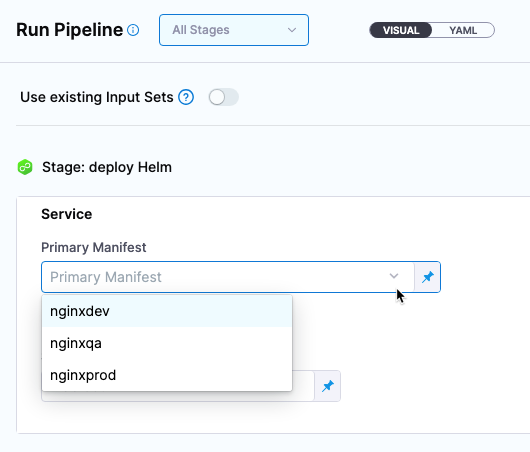
When you run a Harness pipeline that deploys the service, you can select one of the Helm charts to deploy.
By using multiple Helm charts, you can deploy the same artifact with different manifests at pipeline runtime.
Video summary of using multiple manifests
Helm chart expressions
For Kubernetes Helm and Native Helm deployments, you can use the following built-in expressions in your pipeline stage steps to reference chart details.
| Expression | Description |
|---|---|
<+manifests.MANIFEST_ID.helm.name> | Helm chart name. |
<+manifests.MANIFEST_ID.helm.description> | Helm chart description. |
<+manifests.MANIFEST_ID.helm.version> | Helm Chart version. |
<+manifests.MANIFEST_ID.helm.apiVersion> | Chart.yaml API version. |
<+manifests.MANIFEST_ID.helm.appVersion> | The app version. |
<+manifests.MANIFEST_ID.helm.kubeVersion> | Kubernetes version constraint. |
<+manifests.MANIFEST_ID.helm.metadata.url> | Helm Chart repository URL. |
<+manifests.MANIFEST_ID.helm.metadata.basePath> | Helm Chart base path, available only for OCI, GCS, and S3. |
<+manifests.MANIFEST_ID.helm.metadata.bucketName> | Helm Chart bucket name, available only for GCS and S3. |
<+manifests.MANIFEST_ID.helm.metadata.commitId> | Store commit Id, available only when manifest is stored in a Git repo and Harness is configured to use latest commit. |
<+manifests.MANIFEST_ID.helm.metadata.branch> | Store branch name, available only when manifest is stored in a Git repo and Harness is configured to use a branch. |
The MANIFEST_ID is located in service.serviceDefinition.spec.manifests.manifest.identifier in the Harness service YAML. In the following example, it is nginx:
service:
  name: Helm Chart
  identifier: Helm_Chart
  tags: {}
  serviceDefinition:
    spec:
      manifests:
        - manifest:
            identifier: nginx
            type: HelmChart
            spec:
              store:
                type: Http
                spec:
                  connectorRef: Bitnami
              chartName: nginx
              helmVersion: V3
              skipResourceVersioning: false
              commandFlags:
                - commandType: Template
                  flag: mychart -x templates/deployment.yaml
    type: Kubernetes
Define the target Native Helm infrastructure
Defining the target cluster infrastructure definition for a Native Helm chart deployment is the same process as a typical Harness Kubernetes deployment.
For more information, go to Define Your Kubernetes Target Infrastructure.
Pre-existing and dynamically provisioned infrastructure
There are two methods of specifying the deployment target infrastructure:
- Pre-existing: the target infrastructure already exists and you simply need to provide the required settings.
- Dynamically provisioned: the target infrastructure will be dynamically provisioned on-the-fly as part of the deployment process.
For details on Harness provisioning, go to Provisioning overview.
Define your pre-existing target cluster
- In Infrastructure, in Environment, select New Environment.
- In Name, enter quickstart, select Non-Production, and select Save.
- In Infrastructure Definition, select the Kubernetes.
- In Cluster Details, select Select Connector. We'll create a new Kubernetes connector to your target platform. We'll use the same Delegate you installed earlier.
- Select New Connector.
- Enter a name for the Connector and select Continue.
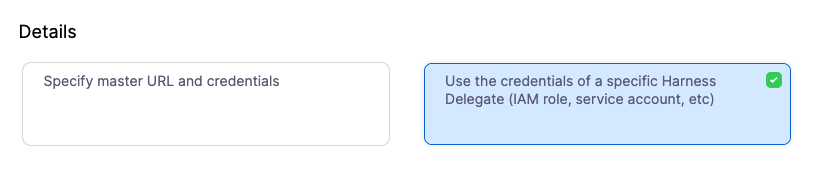
- In Details, select Use the credentials of a specific Harness Delegate, and then select Continue.
- In Set Up Delegates, select the Delegate you added earlier by entering one of its Tags.
- Select Save and Continue. The Connector is tested. Select Finish.
- Select the new Connector and select Apply Selector.
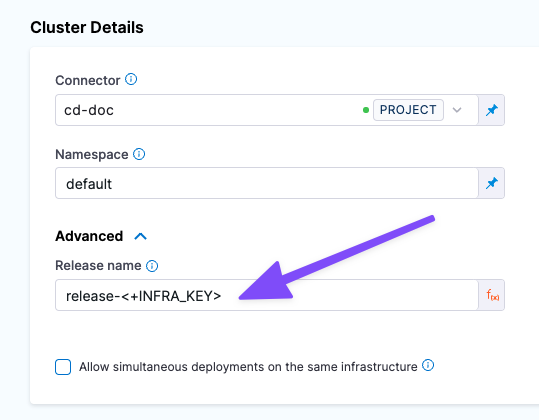
- In Namespace, enter default or the namespace you want to use in the target cluster.
- In Release Name, enter quickstart.
- Select Next. The deployment strategy options appear.
Add a Helm Deployment step
In this example, we're going to use a Rolling deployment strategy.
- Select Rolling, and select Apply.
- The Helm Deployment step is added to Execution.
That's it. Now you're ready to deploy.
Deploy and review
Select Save to save your pipeline.
Select Run.
Select Run Pipeline.
Harness verifies the connections and then runs the Pipeline.
Toggle Console View to watch the deployment with more detailed logging.

Select the Helm Deployment step and expand Wait for Steady State.
You can see Status : quickstart-quickstart deployment "quickstart-quickstart" successfully rolled out.
Congratulations! The deployment was successful.
In your project's Deployments, you can see the deployment listed.
Spec requirements for steady state check and versioning
Harness requires that the release label be used in every Kubernetes spec to ensure that Harness can identify a release, check its steady state, and perform verification and rollback on it.
Ensure that the release label is in every Kubernetes object's manifest. If you omit the release label from a manifest, Harness cannot track it.
The Helm built-in Release object describes the release and allows Harness to identify each release. For this reason, the harness.io/release: {{ .Release.Name }} label must be used in your Kubernetes spec.
See these Service and Deployment object examples:
{{- if .Values.env.config}}
apiVersion: apps/v1
kind: Deployment
metadata:
  name: {{ template "todolist.fullname" . }}
  labels:
    app: {{ template "todolist.name" . }}
    chart: {{ template "todolist.chart" . }}
    release: "{{ .Release.Name }}"
    harness.io/release: {{ .Release.Name }}
    heritage: {{ .Release.Service }}
spec:
  replicas: {{ .Values.replicaCount }}
  selector:
    matchLabels:
      app: {{ template "todolist.name" . }}
      release: {{ .Release.Name }}
  template:
    metadata:
      labels:
        app: {{ template "todolist.name" . }}
        release: {{ .Release.Name }}
        harness.io/release: {{ .Release.Name }}
    spec:
      {{- if .Values.dockercfg}}
      imagePullSecrets:
      - name: {{.Values.name}}-dockercfg
      {{- end}}
      containers:
        - name: {{ .Chart.Name }}
          image: {{.Values.image}}
          imagePullPolicy: {{ .Values.pullPolicy }}
          {{- if or .Values.env.config .Values.env.secrets}}
          envFrom:
          {{- if .Values.env.config}}
          - configMapRef:
              name: {{.Values.name}}
          {{- end}}
          {{- if .Values.env.secrets}}
          - secretRef:
              name: {{.Values.name}}
          {{- end}}
          {{- end}}
...
apiVersion: v1
kind: Service
metadata:
  name: {{ template "todolist.fullname" . }}
  labels:
    app: {{ template "todolist.name" . }}
    chart: {{ template "todolist.chart" . }}
    release: {{ .Release.Name }}
    heritage: {{ .Release.Service }}
spec:
  type: {{ .Values.service.type }}
  ports:
    - port: {{ .Values.service.port }}
      targetPort: http
      protocol: TCP
      name: http
  selector:
    app: {{ template "todolist.name" . }}
    release: {{ .Release.Name }}
The Release name setting in the stage Infrastructure is used as the Helm Release Name to identify and track the deployment per namespace:
Native Helm notes
Please review the following notes.
Ignore release history failed status
By default, if the latest Helm release failed, Harness does not proceed with the install/upgrade and throws an error.
For example, let's say you have a Pipeline that performs a Native Helm deployment and it fails during execution while running helm upgrade because of a timeout error from an etcd server.
You might have several retries configured in the Pipeline, but all of them will fail when Harness runs a helm history in the prepare stage with the message: there is an issue with latest release <latest release failure reason>.
Enable the Ignore Release History Failed Status option to have Harness ignore these errors and proceed with install/upgrade.
Next Steps
See Kubernetes How-tos for other deployment features.