Set up STO integrations with GitLab CI
This tutorial shows how you can set up a STO pipeline that runs a build and scans a code repository automatically in response to a Git event. You'll do the following:
- Add a webhook to the code repo that sends Git-event notifications to the Harness pipeline.
- Add a Git trigger to the pipeline that responds to these notifications.
This tutorial uses a Python repository in Gitlab and Bandit, an open-source tool designed to find common security issues in Python code.
You can use this workflow for other types of GitLab repositories. However, the specific scanner and setup for your scan step might be different.
Before you begin
To do this tutorial, you need the following:
- A GitLab account.
- An SSH key to enable pushing updates to your repositories. For more information, go to Use SSH keys to communicate with GitLab in the Gitlab documentation.
- A Personal Access Token to enable pushing API requests. For information about the scopes to enable for your token, go to GitLab connector settings reference.
- A Harness code repository connector to your Git service.
- A Harness Docker connector
Set up the STO pipeline
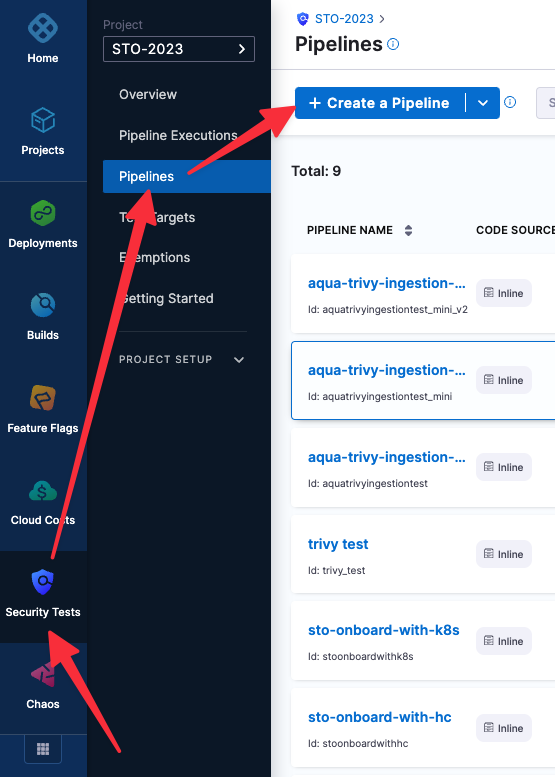
In the Harness UI, click Security Tests, then Pipelines, then Create a Pipeline.
Enter a pipeline name and click Start.
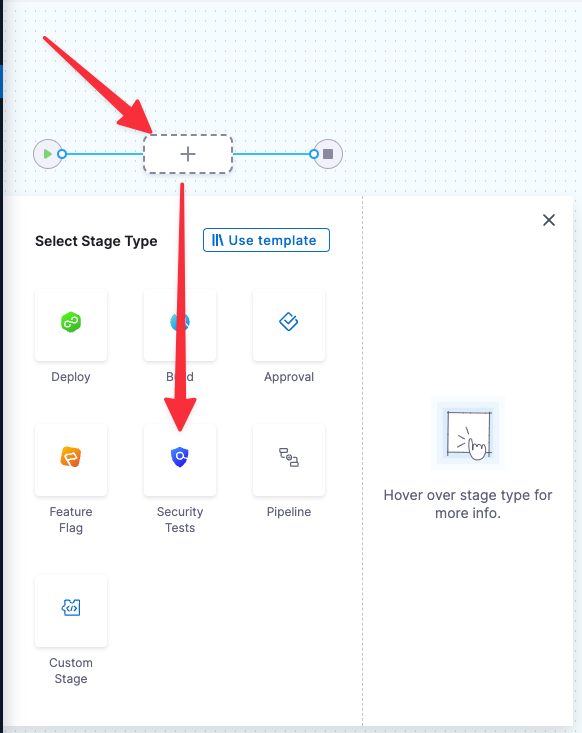
In the visual editor, add a Security Tests stage.
In About your Stage, do the following:
Enter a name.
In Configure Codebase, select your codebase connector and enter the repository that you want to scan.
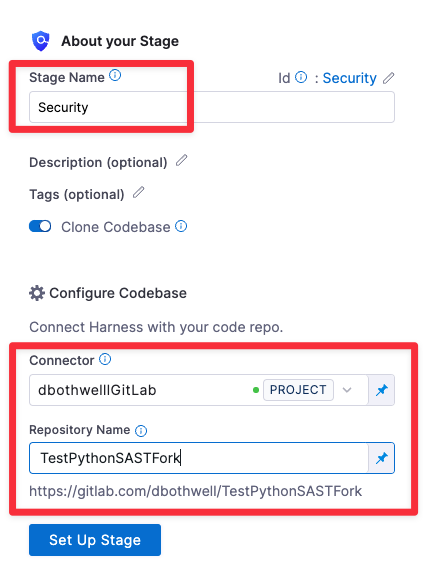
Click Set up Stage.
In Infrastructure, specify your build infrastructure. STO supports Cloud (Linux AMD64) and Kubernetes infrastructures.
In Execution, click Add Step and select Bandit.
In Configure Bandit, specify the following:
Scan Mode = Orchestration
Target name = your-name-dvpwa
Target variaent = <+codebase.branch>
Click Apply Changes to return to the pipeline,
Click Run (top right). In Run Pipeline, select Git Branch for the build type and master for the branch name. Then click Run Pipeline to ensure that the pipeline runs successfully as configured.
Add a trigger to your pipeline
Add a trigger to your pipeline that that listens for incoming requests on a webhook.
In the rop right of the visual editor, click Triggers.
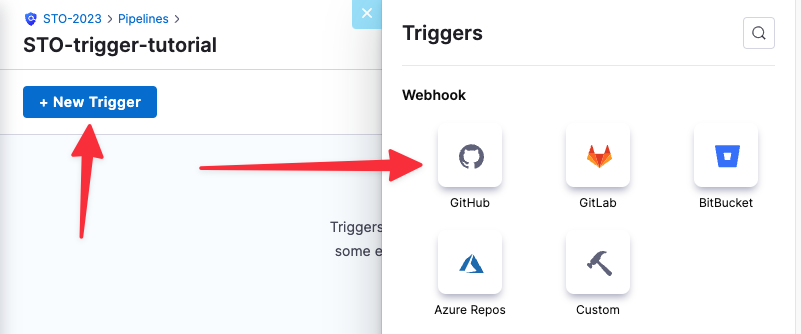
Click New Trigger and select the webhook for your Git service provider.
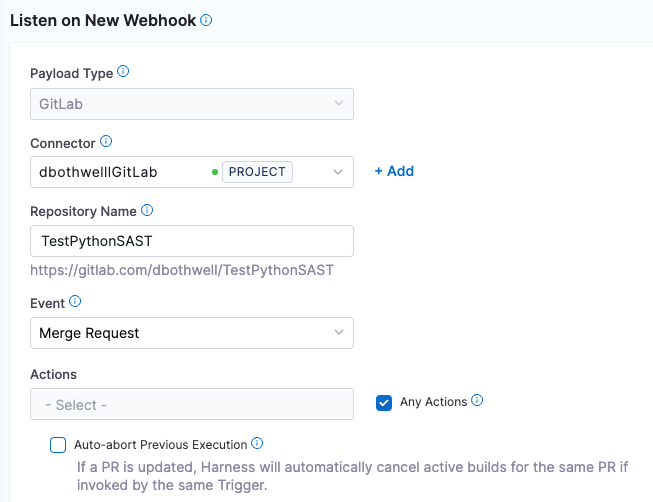
In Configuration, specify the webhook as follows. This is a typical setup, where any event related to a merge request triggers a pipeline build.
Connector = The connector to your Git service provider.
Repository Name = The repository you want to scan.
Event = Merge Request.
Select Any Actions.
In Conditions, set the conditions for running the pipeline. The typical setup is to trigger a build based on the main or master branch of the repo.

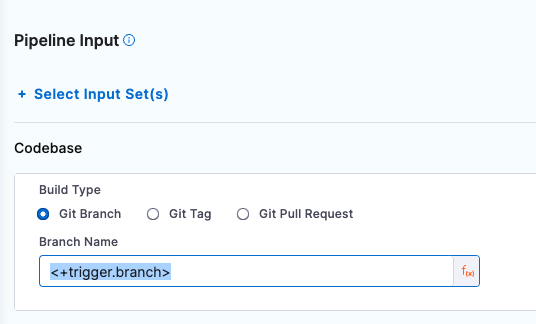
In Pipeline Input, select Git Branch for the build type and enter <+trigger.branch> for the branch name. Then click Create Trigger.
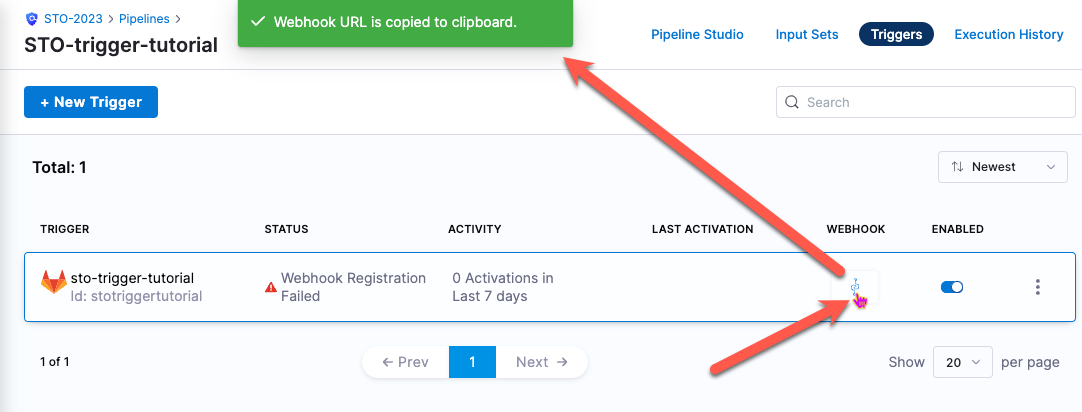
The new trigger now appears in the Triggers table. Note that this table includes a Webhook column with a link.
Click the Webhook link to copy the webhook URL for this trigger to the clipboard. You will now add this webhook to your Git service.
Add the trigger webhook to your Git service
The steps to do this differ depending on the service you're using. These steps assume you're using GitLab.
Go to your GitLab project and choode Settings > Webhooks in the left menu.
Enter the webhook URL and your GitLab personal access token.
Select the Merge request event as the event type to trigger the webhook.
Click Add webhook at the bottom of the page.
Create a Merge Request in GitLab
To verify that your trigger is working correctly, do the following:
Open a browser page and point it to the Execution History page for your Harness pipeline.
Go to your GitLab repo, then create and approve a merge request.
With the integration in place, the following events occur when you create a merge request in your GitLab repository:
GitLab sends a request to the Harness webhook.
The Harness pipeline starts a new build automatically, using information from the incoming request.
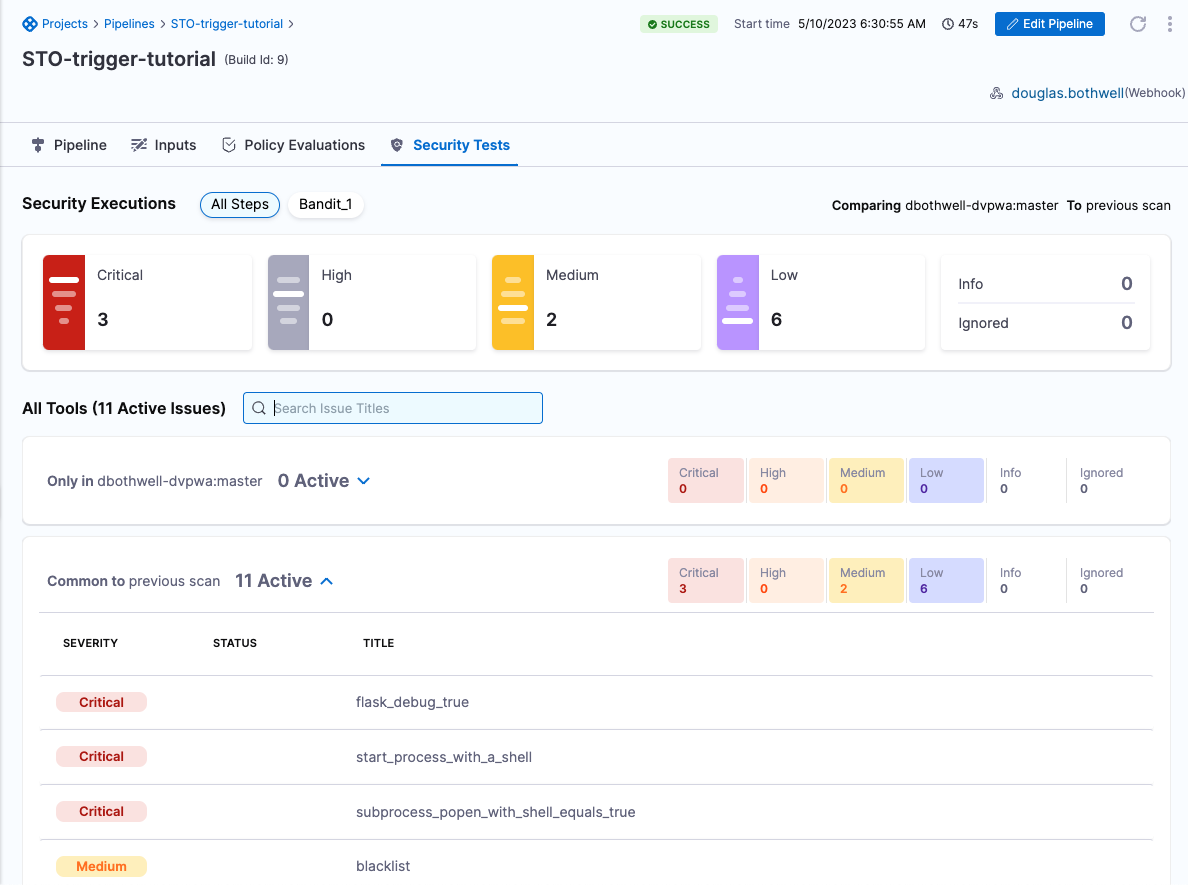
When the build finishes, you can see the scan results in the Security Tests tab.

