Approvals
This tutorial demonstrates how to use approvals in Harness CD pipelines.
Before you begin
Before you start this tutorial, you need to have a Harness CD pipeline with active delegates and connectors. Please follow this tutorial that gets you started with Harness Continuous Delivery (CD). The tutorial below uses the Harness resources created as part of the get-started tutorial.
Harness User Group: This tutorial uses Harness User Groups to manage user access. Create a user group named approval-demo at the account level, and add yourself as a user.
- Manual Approval
- JIRA Approval
- ServiceNow Approval
You can specify Harness User Group(s) to approve or reject a Pipeline at any point in its execution. During deployment, the User Group members use Harness Manager to approve or reject the Pipeline deployment manually.
- Approval Stage
- Approval Steps
Approvals can be added in between Stages to prevent the Pipeline execution from proceeding without an approval.
Add an Approval stage
In the visual view of the pipeline, select Add Stage, and then select Approval as the stage type.
Name the stage
manual-approval-stage, and select Harness Approval as the approval type.Select the Approval step to open the Manual Approval pane. The Manual Approval pane includes predefined values for Name, Timeout, and Approval Message. You need to add the User Group you created under Approvers. You can also add Approver Inputs under this step.
Select Apply Changes. Your approval step is created.
Save the changes to the pipeline.
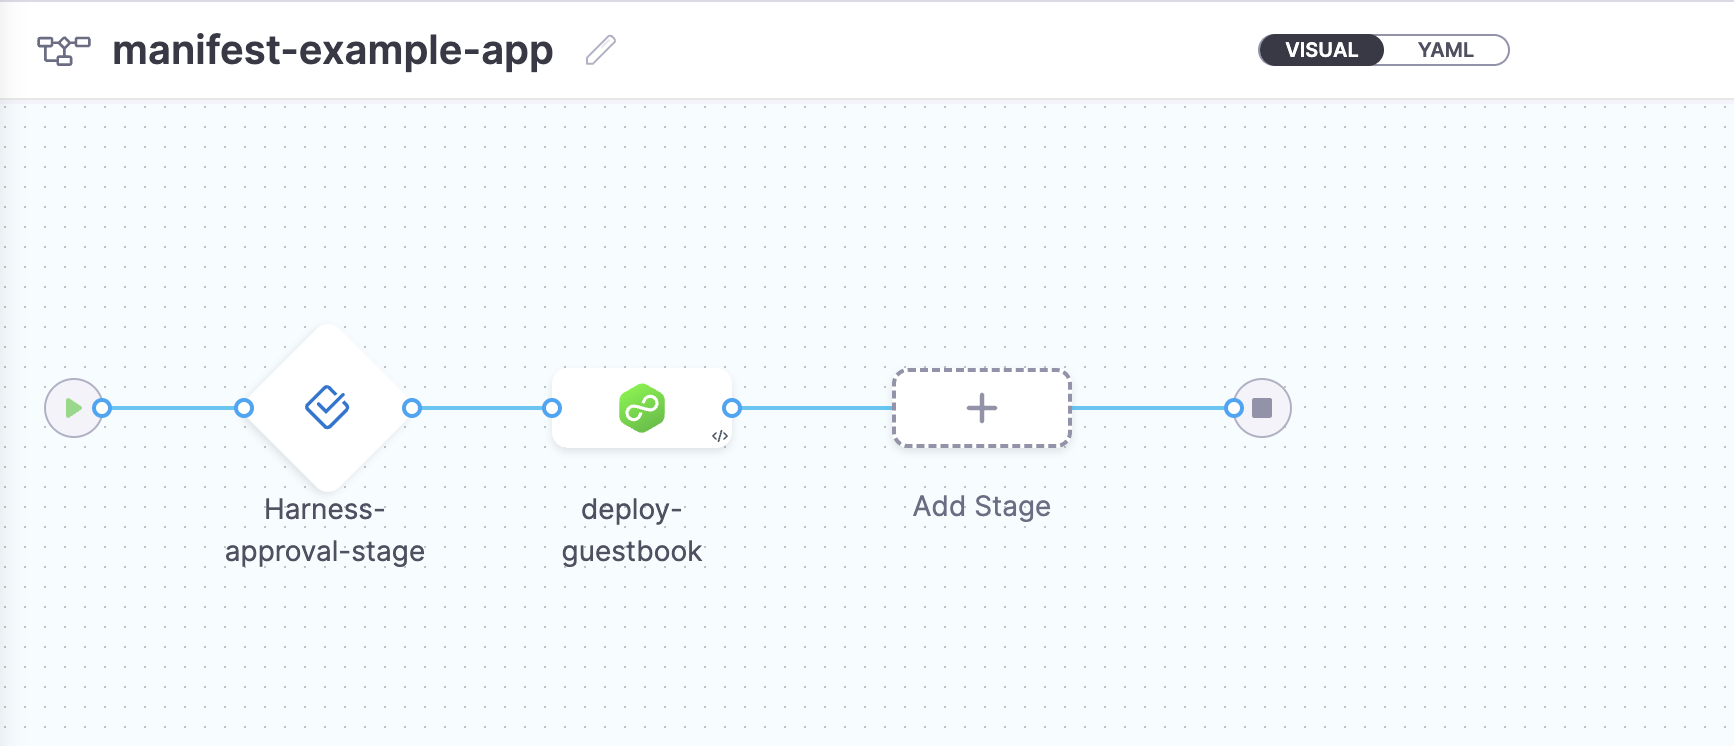
Since you already have a deploy stage present before the approval stage, drag the deploy stage to the right of the approval stage.
Verify and confirm the approval stage and deploy stage as shown below.

Select Save, and then select Run to run the pipeline.
As an approver, you'll receive notification on the Console Log pane under the Logs once the pipeline is running to approve or reject the pipeline. Click on Approve to run the pipeline.
An Approval stage enables an approver to approve or reject the step, stopping the pipeline. The approver can also add comments and define variables for use by subsequent approvers and steps.
For this tutorial, we will use the visual view of the pipeline.
Add an Approval step
In the CD stage (deploy-guestbook), go to the Execution tab, and then select Add Step.
In the Step Library, under Approval, select Harness Approval. The Manual Approval pane includes predefined values for Name, Timeout, and Approval Message.
Add the User Group you created under Approvers. (Optional) You can also add Approver Inputs under this step.
Select Apply Changes. Your approval step is created.
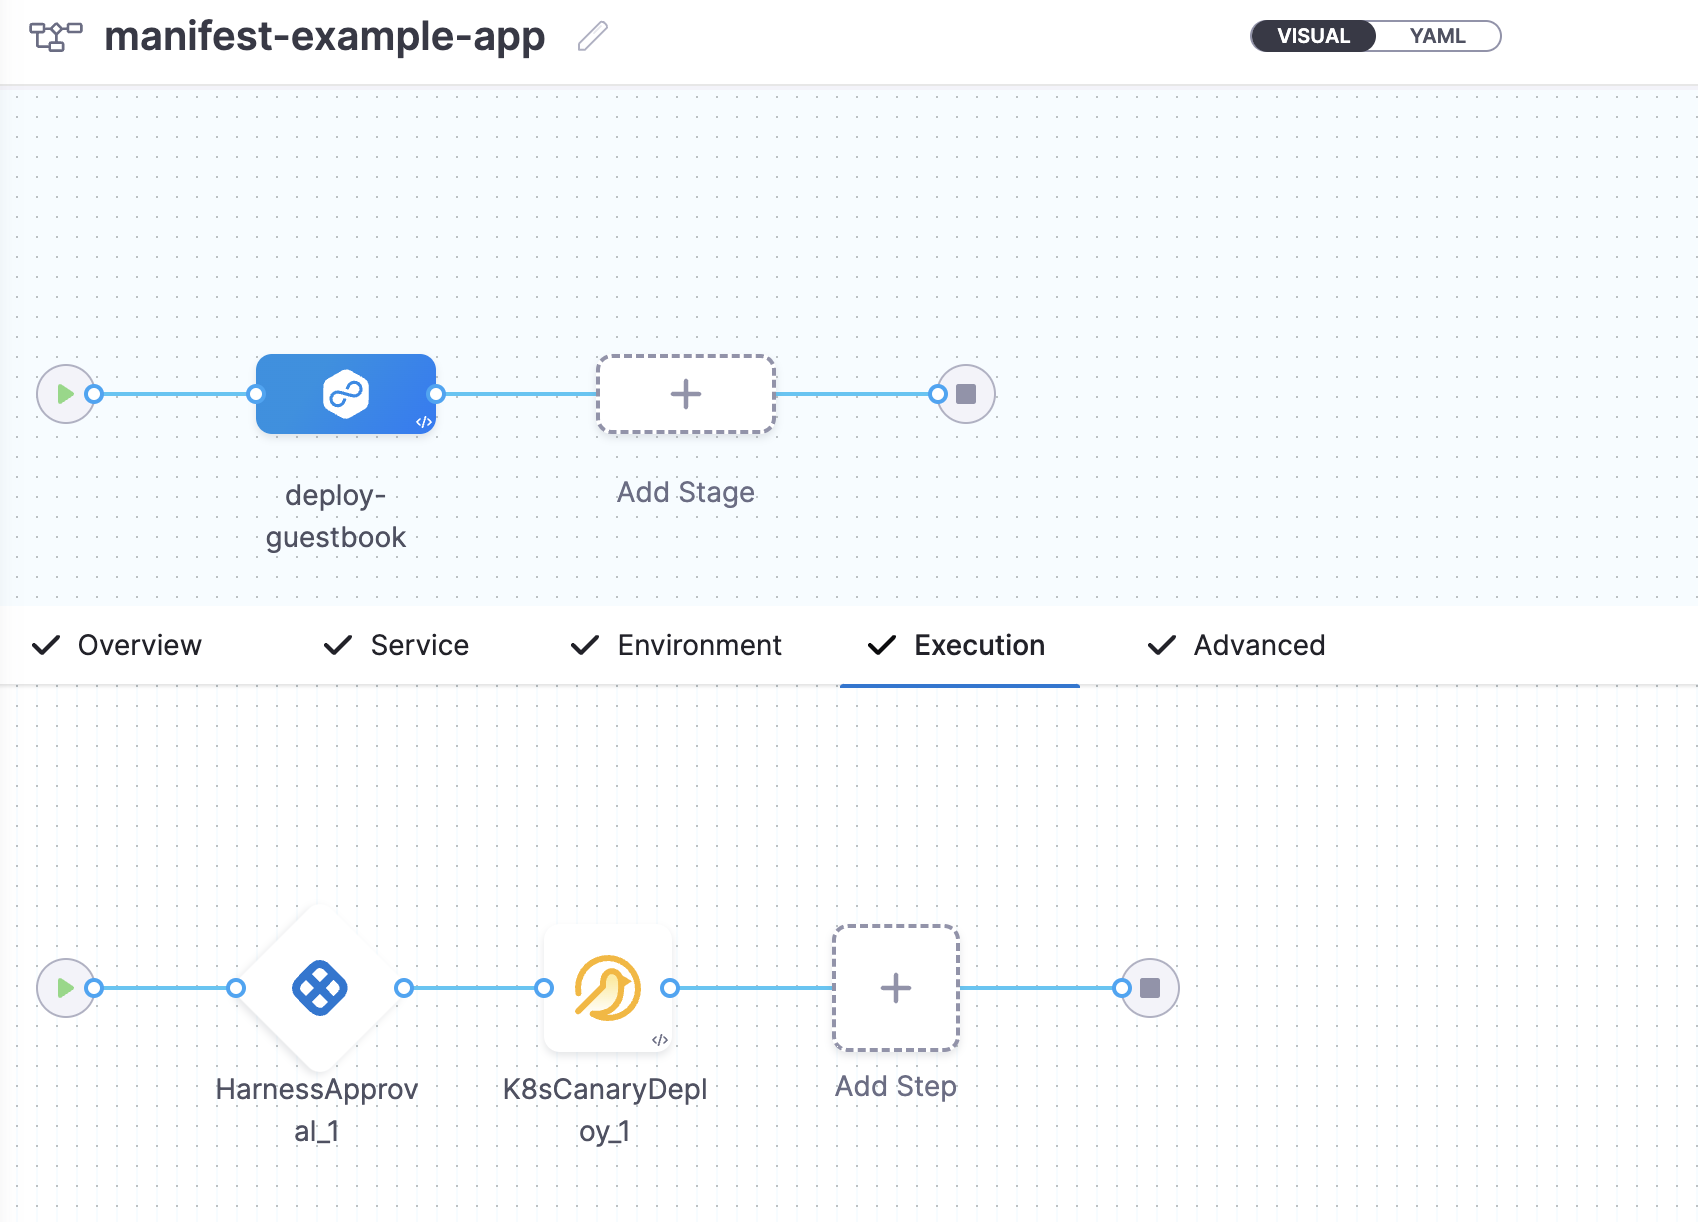
Since you already have a deploy step present before the approval step, drag the deploy step to the right of Harness approval step.
Verify and confirm the pipeline stage and execution steps as shown below.

Select Save, and then select Run to run the pipeline.
Approval steps should not be added to run in parallel with other steps, including other Approval steps. The Harness Pipeline Studio will not allow you to add Approval steps in parallel with other steps, but the pipeline YAML editor does not prevent this setup. During execution, a successful parallel Approval step will not fail the deployment, but it is not a valid configuration because Approvals are checks on the release process and should always be used between steps.
This feature is behind a Feature Flag and is available only to paid customers. Contact Harness Support to enable the feature.
Jira issues can be used to approve or reject a pipeline or stage at any point in its execution. During deployment, the pipeline evaluates the fields in the Jira ticket based on criteria you define. Its approval or rejection determines if the Pipeline or stage may proceed.
You can add the Jira Approval step in Approval stages or in CD stages. The Jira Approval step prevents the stage execution from proceeding without an approval.
Before you begin
Verify that you have the following:
Personal Access Token: Add the JIRA API token as a Harness Text Secret, with the name
jirapatJIRA Connector: For this tutorial you need to create a JIRA Connector of the name
jira-approval. If you've done the Deploy using Kubernetes Manifest tutorial, use this jira-connector.yml to create connector under the project setup.- In the YAML, replace the
JIRA_URLwith your company base URL for Jira applications, for example:https://mycompany.atlassian.net. - Replace the
Usernamewith the email ID you use to log in to Jira.
- In the YAML, replace the
Jira Task: Create a dummy Jira issue with type Task on the project for which your API has read access. Then set the status to
Done.
Limitations
Harness supports only Jira fields of type Option, Array, Any, Number, Date, and String. Harness does not integrate with Jira fields that manage users, issue links, or attachments. This means that Jira fields like Assignee and Sprint are not accessible in Harness' Jira integration.
Add the Jira Approval step
In the CD stage (deploy-guestbook), go to the Execution tab, and then select Add Step.
In the Step Library, under Approval, select Jira Approval.
Add a Name to the step, and set the Timeout to 20s.
Add the Jira Connector, and then add the Issue Key of the Jira issue you created above.
Now set the Approval Criteria. There are two ways to do this. You can also specify a combination of the two:
- Conditions: Use the Jira Field, Operator, and Value to define approval criteria.
- JEXL Expression: Use the JEXL Expression to define the same values as under conditions, for example:
<+issue.Status> == "Done"
For this tutorial, select Conditions and specify the condition Status = Done.
Select Apply Changes. Your Jira Approval step is created.
Since you already have a deploy step present before the approval step, drag the deploy step to the right of Jira approval step.
Verify and confirm the pipeline stage and execution steps.
Select Save, and then select Run to run the pipeline.
Add the Jira Approval stage
In the visual view of the pipeline, click on Add Stage and select the Stage Type as approval.
Name the stage as
jira-approval-stageand select the type as Jira.infoYou do not need to use the Jira Create and Jira Update steps with the Jira Approval step. They are included in the
Jira Approval stagebecause many users want to create a Jira issue, approve/reject based on its settings, and then update the issue all in one stage.Follow the steps here and update the Jira Create step.
Similarly, follow the steps here, and update the Jira Update step.
For the Jira Approval step, follow the instructions above in Add the JIRA Approval step.
Drag the deploy-guestbook demo stage to the right of the jira-approval stage.
Save and Run the pipeline.
This feature is behind a Feature Flag and is available only to our paid customers.
ServiceNow tickets can be used to approve or reject a pipeline or stage at any point in its execution. During deployment, a ServiceNow ticket's fields are evaluated according to the criteria you define, and its approval or rejection determines if the pipeline or stage may proceed.
Approvals can be added as stages or in-between stage steps to prevent stage execution from proceeding without approval.
Before you begin
Verify that you have the following:
ServiceNow Connector: You need to connect to ServiceNow using the connector.
ServiceNow Ticket: Create a dummy ServiceNow ticket with the
stateof the ticket set tonew.
Limitations
The ServiceNOw API only allows datetime and time values in the UTC timezone. Hence, for any datetime/time fields in Harness ServiceNow steps must be provided in UTC format.
Add ServiceNow Approval Step
In the CD stage deploy-guestbook, go to the Execution tab, and then select Add Step.
In the Step Library, under Approval, select ServiceNow Approval.
Add a Name to the step, and set the Timeout to 20s.
Add the ServiceNow Connector and the Ticket Number of the issue you created above.
Now set the Approval Criteria. There are two ways to do this. You can also specify a combination of the two:
- Conditions: Use the Field, Operator, and Value to define approval criteria.
- JEXL Expression: Use the JEXL Expression to define the same values as under conditions, for example
<+ticket.state.displayValue> == "New".
For this tutorial, use the JEXL Expression
<+ticket.state.displayValue> == "New".Select Apply Changes. Your ServiceNow approval step is created.
Since you already have a deploy step present before the approval step, drag the deploy step to the right of ServiceNow approval step.
Verify and confirm the pipeline stage and execution steps.
Select Save, and then select Run to run the pipeline.
Add ServiceNow Approval Stage
In the visual view of the pipeline, select Add Stage, and select Approval for the Stage Type.
Name the stage
snow-approval-stage, and then select ServiceNow for the approval type.Select Set Up Stage.
Under Execution, select the ServiceNow Approval step, and follow the instructions in Add ServiceNow Approval Step.
Drag the deploy-guestbook stage to the right of the jira-approval stage.
Select Save, and then select Run to run the pipeline.