Add a Kubernetes cluster connector
You can connect Harness with your Kubernetes clusters using a Kubernetes Cluster Connector or Google Cloud Platform (GCP) Connector. This topic explains how to set up the Kubernetes Cluster Connector.
Once connected, you can use Kubernetes and Harness for provisioning infrastructure, running a CI build farm, and deploying microservices and other workloads to clusters.
What roles should my Kubernetes account have? What roles and policies needed by the account used in the Connector depend on what operations you are using Harness for in the cluster. For a list of roles and policies, see Kubernetes Cluster Connector Settings Reference.
Before you begin
Visual summary
Here's a quick video that shows you how to add a Kubernetes Cluster Connector and install the Kubernetes Delegate in the target cluster at the same time:
Roles and policies for the connector
The IAM roles and policies needed by the account used in the Connector depend on what operations you are using with Harness and what operations you want Harness to perform in the cluster.
You can use different methods for authenticating with the Kubernetes cluster, but all of them use a Kubernetes Role.
The Role used must have either the cluster-admin permission in the target cluster or admin permissions in the target namespace.
For a detailed list of roles and policies, see Kubernetes Cluster Connector Settings Reference.
In general, the following permissions are require:
- Deployments: A Kubernetes service account with permission to create entities in the target namespace is required. The set of permissions should include
list,get,create,watch(to fetch the pod events), anddeletepermissions for each of the entity types Harness uses. In general, cluster admin permission or namespace admin permission is sufficient. - Builds: A Kubernetes service account with CRUD permissions on Secret, Service, Pod, and PersistentVolumeClaim (PVC).
If you don’t want to use resources: [“*”] for the Role, you can list out the resources you want to grant. Harness needs configMap, secret, event, deployment, and pod at a minimum for deployments, as stated above. Beyond that, it depends on the resources you are deploying via Harness.
If you don’t want to use verbs: [“*”] for the Role, you can list out all of the verbs (create, delete, get, list, patch, update, watch).
The YAML provided for the Harness Delegate defaults to cluster-admin because that ensures anything could be applied. Any restriction must take into account the actual manifests to be deployed.
Connect to Amazon EKS
To connect Harness to Amazon EKS, use the platform-agnostic Kubernetes Cluster Connector discussed in this topic or an Elastic Kubernetes Service (EKS) cloud connector.
AKS clusters must have local accounts enabled
To use an AKS cluster for deployment, the AKS cluster must have local accounts enabled (AKS property disableLocalAccounts=false).
Switching IAM policies
If the IAM role used by your Connector does not have the policies required, you can modify or switch the role.
You simply change the role assigned to the cluster or the Harness Delegate your Connector is using.
When you switch or modify the IAM role, it might take up to 5 minutes to take effect.
Supported platforms and technologies
For a list of the platforms and technologies supported by Harness, see Supported Platforms and Technologies.
Add a Kubernetes cluster connector
Open a Harness Project.
In Project Setup, click Connectors.
Click New Connector, and click Kubernetes Cluster. The Kubernetes Cluster Connector settings appear.
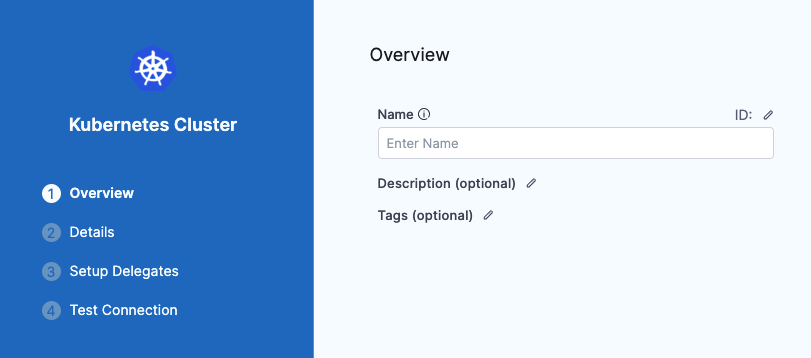 In Name, enter a name for this connector.
Harness automatically creates the corresponding Id (entity identifier).
Click Continue.
Enter credentials
Choose the method for Harness to use when connecting to the cluster.
Select one of the following:
- Specify master URL and credentials:
- You provide the Kubernetes master node URL. The easiest method to obtain the master URL is using kubectl:
kubectl cluster-info. - Next, enter the Service Account Key or other credentials. You can use any service account; the service account doesn't have to be attached to a delegate.
- You provide the Kubernetes master node URL. The easiest method to obtain the master URL is using kubectl:
- Use the credentials of a specific Harness Delegate: Select this option to have the Connector inherit the credentials used by the Harness Delegate running in the cluster. You can install a Delegate as part of adding this Connector.
For details on all of the credential settings, see Kubernetes Cluster Connector Settings Reference.
Obtaining the Service Account token using kubectl
To use a Kubernetes Service Account (SA) and token, you will need to either use an existing SA that has the cluster-admin permission (or namespace admin) or create a new SA and grant it the cluster-admin permission (or namespace admin).
For example, here's a manifest that creates a new SA named harness-service-account in the default namespace.
# harness-service-account.yml
apiVersion: v1
kind: ServiceAccount
metadata:
  name: harness-service-account
  namespace: default
Next, you apply the SA.
kubectl apply -f harness-service-account.yml
Next, grant the SA the cluster-admin permission.
# harness-clusterrolebinding.yml
apiVersion: rbac.authorization.k8s.io/v1beta1
kind: ClusterRoleBinding
metadata:
  name: harness-admin
roleRef:
  apiGroup: rbac.authorization.k8s.io
  kind: ClusterRole
  name: cluster-admin
subjects:
- kind: ServiceAccount
  name: harness-service-account
  namespace: default
Next, apply the ClusterRoleBinding.
kubectl apply -f harness-clusterrolebinding.yml
Once you have the SA added, you can gets its token using the following commands.
SERVICE_ACCOUNT_NAME={SA name}

NAMESPACE={target namespace}

SECRET_NAME=$(kubectl get sa "${SERVICE_ACCOUNT_NAME}" --namespace "${NAMESPACE}" -o=jsonpath='{.secrets[].name}')

TOKEN=$(kubectl get secret "${SECRET_NAME}" --namespace "${NAMESPACE}" -o=jsonpath='{.data.token}' | base64 -d)

echo $TOKEN
The | base64 -d piping decodes the token. You can now enter it into the Connector.
Creating Service Account tokens for Kubernetes versions 1.24 and later
The Kubernetes SA token is not automatically generated if the SAs are provisioned under Kubernetes versions 1.24 and later. You must create a new SA token and decode it to the base64 format.
Use the following command to create a SA bound token using kubectl:
kubectl create token <service-account-name> --bound-object-kind Secret --bound-object-name <token-secret-name>
You can also create SAs using manifests. For example, here's a manifest that creates a new SA:
apiVersion: v1
kind: ServiceAccount
metadata:
  name: <service-account-name>
  namespace: default

---
apiVersion: v1
kind: Secret
type: kubernetes.io/service-account-token
metadata:
  name: <token-secret-name>
  annotations:
    kubernetes.io/service-account.name: "<service-account-name>"
For more details, go to Managing Service Accounts.
Set up delegates
Regardless of which authentication method you selected, you select Harness Delegates to perform authentication for this Connector.
If you do not have Harness Delegates, click Install New Delegate to add one to the cluster, or any cluster in your environment that can connect to the cluster.
Harness uses Kubernetes Cluster Connectors at Pipeline runtime to authenticate and perform operations with Kubernetes. Authentications and operations are performed by Harness Delegates.
You can select Any Available Harness Delegate and Harness will select the Delegate. For a description of how Harness picks delegates, go to Delegates overview.
You can use delegate tags to select one or more delegates. For details on delegate tags, go to Use delegate selectors.
If you need to install a delegate, see Delegate installation overview or the Visual Summary above.
Click Save and Continue.
Harness tests the credentials you provided using the delegates you selected.