Add Microsoft Azure Cloud Provider
This topic explains how to connect to the Microsoft Azure cloud where you will deploy your applications or virtual machine scale set (VMSS) using Harness.
You add Cloud Providers to your Harness Account and then reference them when defining deployment environments.
In this topic:
- Before You Begin
- Visual Summary
- Review: Permissions
- Step 1: Add the Cloud Provider
- Step 2: Gather the Required Information
- Step 3: Client ID
- Step 4: Tenant ID
- Step 5: Select Encrypted Key
- Artifact Support for Download and Copy
Before You Begin
- See Harness Key Concepts.
Visual Summary
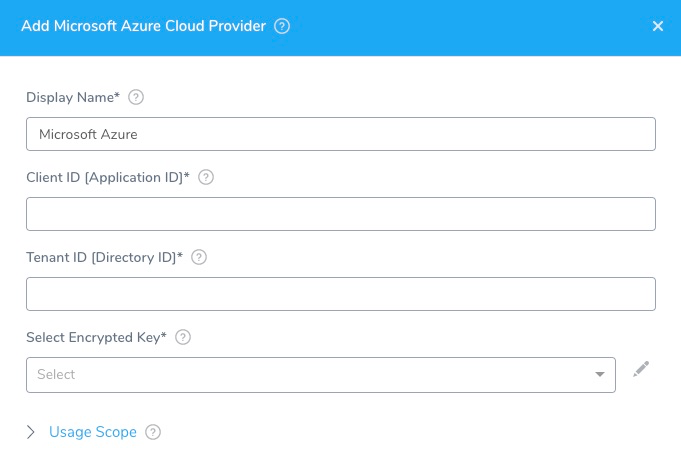
Here's an overview of the Microsoft Azure Cloud Provider settings.
Review: Permissions
This section assume you are familiar with Azure RBAC.
For security reasons, Harness uses an application object and service principal rather than a user identity. The process is described in How to: Use the portal to create an Azure AD application and service principal that can access resources from Azure.
Briefly, the process is:
- Register an application with Azure AD and create a service principal.
- Assign a role to the Azure application.
You assign the role depending on the scope you want to use (Azure subscription or resource group). Typically, an Azure subscription is used.
You use the scope to assign a role to the Azure application.
The role you assign depends on which Azure resource Harness will use (ACR, AKS, etc). See the list below these steps.
You will use the same scope on the resource Harness will use. For example, your ACR container registry will use the same Azure subscription that you used to assign a role to the Azure application. - Get the application's tenant and app/client ID values for signing in.
- Create a new application secret.
- Use the tenant ID, app/client ID, and new application secret in the Harness Azure Cloud Provider.
Make sure the following permissions are assigned to the roles.
Azure Container Repository (ACR)
Currently, Harness supports public ACR repos. Harness will be supporting private repos soon. Contact Harness Sales for more information.
The Reader role must be assigned. This is the minimum requirement.
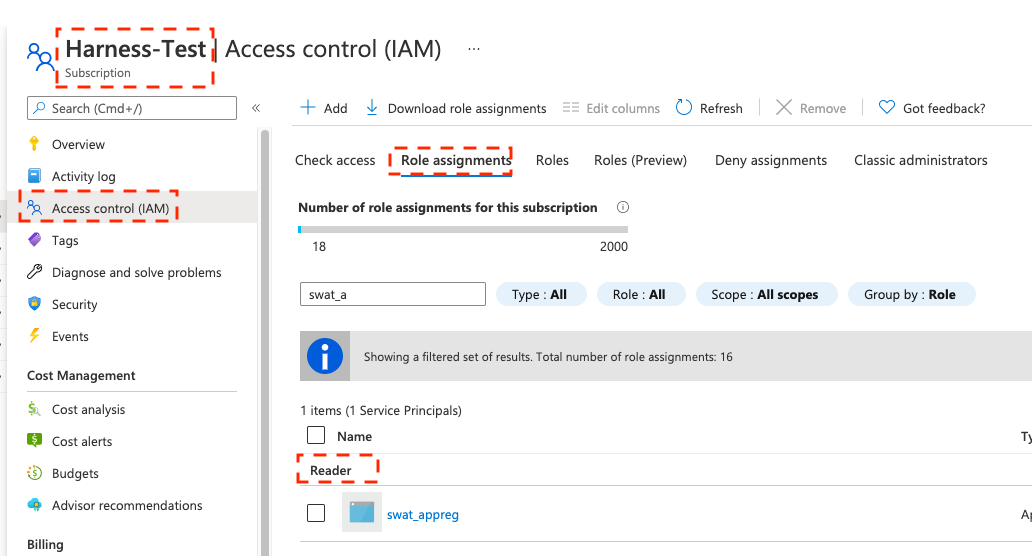
You must provide the Reader role in the role assignment at the Subscription level used by the Application ID entered in the Cloud Provider. The application needs permission to list all container registries.
Some common mistakes:
- If you put the Reader role in a different IAM section of Azure.
- If you provide only the AcrPull role instead of Reader. It might appear that the AcrPull role gives access to a specific registry, but Harness needs to list all registries.
Harness supports 500 images from an ACR repo. If you do not see some of your images you might have exceeded this limit. This is the result of an Azure API limitation.
If you connect to an ACR repo via the platform agnostic Docker Registry, the limit is 100.
Azure Kubernetes Services (AKS)
There are two options for connecting Harness to your target AKS cluster:
- Recommend: Install a Kubernetes Delegate in the target AKS cluster and use it for authentication in a Harness Kubernetes Cluster Cloud Provider. The Harness Kubernetes Cluster Cloud Provider is platform-agnostic.
With this method, AKS permissions are not required at all. This is recommended. - As an alternative, use the Harness Azure Cloud Provider as described in this topic. The Owner role must be assigned.
Azure Web Apps
The Contributor role must be assigned. This is the minimum requirement.
Azure Virtual Machines for IIS and SSH Deployments
The Reader role must be assigned. This is the minimum requirement.
This role is only used by the Harness Delegate when it uses the Azure APIs to discover target VMs.
For IIS deployments, Harness uses a WinRM connection for credentials. See Add WinRM Connection Credentials.
For SSH deployments, Harness uses SSH keys for credentials. See Add SSH Keys.
Azure Resource Management (ARM)
Currently, this feature is behind a Feature Flag. Contact Harness Support to enable the feature. Feature Flags can only be removed for Harness Professional and Essentials editions. Once the feature is released to a general audience, it is available for Trial and Community Editions.
The roles required depend on the scope type of your ARM template:
- Resource group: requires the Contributor role.
- Subscription: requires the Contributor role.
- Management group: requires the Contributor role.
- Tenant: requires the Contributor or Owner role. For example, creating a Tenant requires the Contributor role, but the Owner role is required to create role assignments.
- Key Vault access: to enable access to Key Vaults from the ARM templates you use in Harness, make sure you select the Azure Resource Manager for template deployment option in the Key Vault Access Policy.
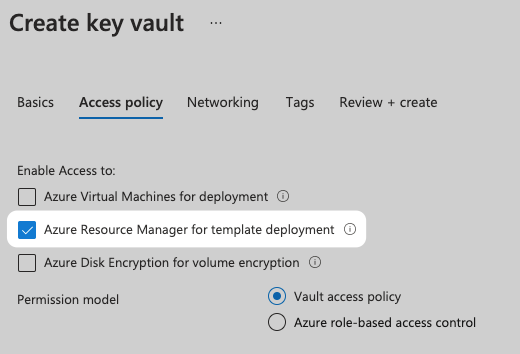
The Azure roles provided in the Cloud Provider must allow Harness to provision the Azure resources in your ARM templates. For example, to create a policy assignment, the Resource Policy Contributor role is required.
Azure Blueprint
Currently, this feature is behind a Feature Flag. Contact Harness Support to enable the feature. Feature Flags can only be removed for Harness Professional and Essentials editions. Once the feature is released to a general audience, it is available for Trial and Community Editions.
In Azure, the permissions required to create and delete Blueprints are listed in Permissions in Azure Blueprints from Azure.
The Azure roles required on the service principal used by Harness depend on the scope type of your Blueprint definition.
Management Scope
- System-assigned managed identity:
- Contributor role at the management group scope where the Blueprint definitions will be created and published
- Owner role at subscription scope where the assignment will be done.
- System-assigned user identity:
- Contribute role at the management group scope where Blueprint definitions will be created and published
Harness does not manage the right and lifecycle of a user-managed identity. You will need to manage the user-managed identity.
- Contribute role at the management group scope where Blueprint definitions will be created and published
Subscription Scope
- System-assigned managed identity:
- Owner role at the subscription scope.
- System-assigned user identity:
- Contribute role to create and publish the Blueprint definition.
Harness does not manage the right and lifecycle of a user-managed identity. You are responsible for managing the right and lifecycle of a user-managed identity that is in charge of assignment.
- Contribute role to create and publish the Blueprint definition.
Step 1: Add the Cloud Provider
To add a cloud provider to your Harness account, do the following:
- Click Setup, and then click Cloud Providers.
- Click Add Cloud Provider and select Microsoft Azure.
The Add Microsoft Azure Cloud Provider panel appears.
Step 2: Gather the Required Information
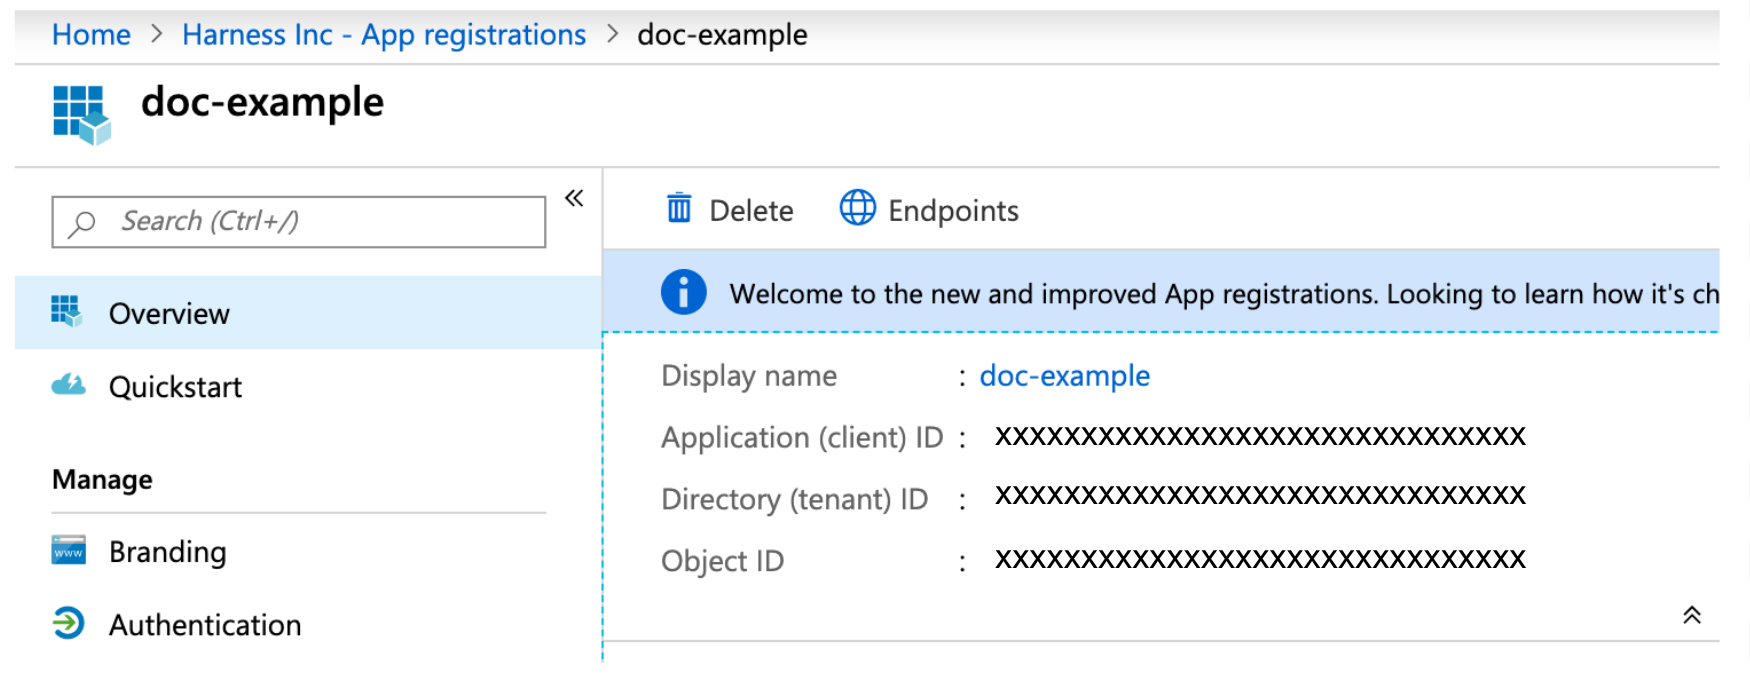
In Microsoft Azure, you can find the information you need in the App registration Overview page:
Step 3: Client ID
This is the Client Application ID for the Azure app registration you are using. It is found in the Azure Active Directory App registrations. For more information, see Quickstart: Register an app with the Azure Active Directory v1.0 endpoint from Microsoft.
To access resources in your Azure subscription, you must assign the Azure App registration using this Client ID to a role in that subscription. Later, when you set up an Azure service infrastructure in a Harness environment, you will select a subscription.
If the Azure App registration using this Client ID is not assigned a role in a subscription, no subscriptions will be available.
For more information, see Assign the application to a role and Use the portal to create an Azure AD application and service principal that can access resources from Microsoft.
Step 4: Tenant ID
The Tenant ID is the ID of the Azure Active Directory (AAD) in which you created your application. This is also called the Directory ID. For more information, see Get tenant ID and Use the portal to create an Azure AD application and service principal that can access resources from Azure.
Step 5: Select Encrypted Key
For secrets and other sensitive settings, select or create a new Harness Encrypted Text secret.
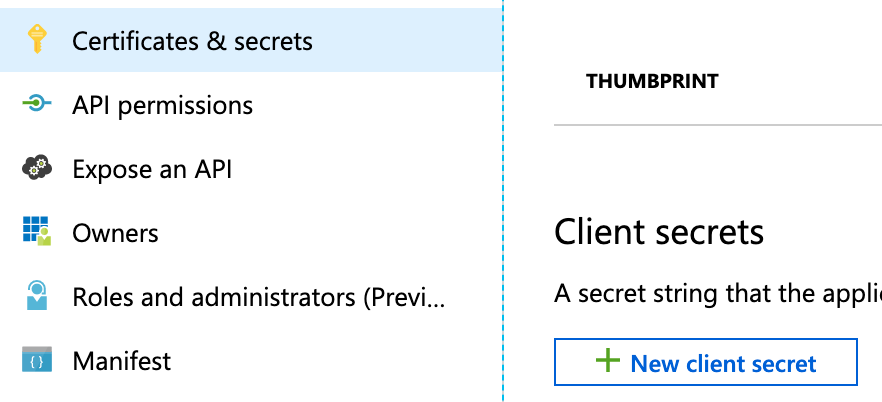
This is the authentication key for your application. This is found in Azure Active Directory, App Registrations. Click the App name. Click Certificates & secrets, and then click New client secret.
You cannot view existing secret values, but you can create a new key. For more information, see Create a new application secret from Azure.
